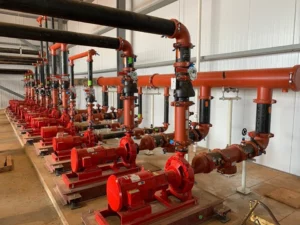
Grooved pipe fitting gasket pinching continues to cause headaches on chilled water jobs. The seal fails when the gasket compresses unevenly or gets trapped during assembly, leading to leaks that show up right away or after the system runs through a few cycles. In chilled water lines—usually holding steady at 40–55°F under typical operating pressures—the EPDM material stiffens just enough in the cold to lose some pliability. Any slip in technique then turns a minor misalignment or dry spot into a weak point that lets water escape.
These failures translate to real costs: callbacks eat time, water damage hits ceilings and floors in corridors or mechanical rooms, pressure tests fail, and schedules slip. Field experience shows that digging into the main triggers, learning to spot trouble early, and sticking to proven assembly steps cuts most of these issues. The sections below lay out the mechanics, the patterns seen in chilled water work, ways to diagnose on site, repair sequences, and a solid prevention routine that keeps joints tight from day one.

What Gasket Pinching Really Means in Grooved Fittings
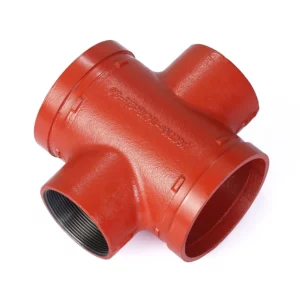
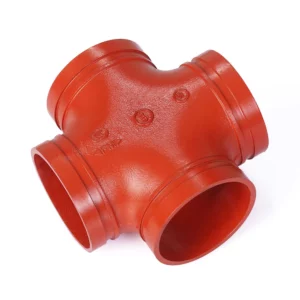
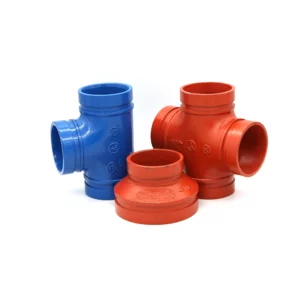
Acoplamientos ranurados connect pipe ends mechanically without welding. The housing wraps around a gasket seated in the rolled or cut grooves on each pipe. Bolt torque draws the housing keys into those grooves, squeezing the gasket against the pipe ends to create a seal that actually tightens under system pressure—the gasket lips flare outward as pressure builds.
Pinching happens when compression turns uneven. Parts of the gasket fold, twist, or squeeze too hard between metal surfaces instead of spreading uniformly. That creates thin spots or channels where fluid finds a path. On chilled water lines the cold reduces gasket flexibility, vibration from pumps adds stress, and thermal swings pull pipes slightly apart or push them together. A small initial pinch often holds during static testing but opens up once the system cycles, turning a quick fix into a bigger rework job.
Key Causes Seen in the Field
Several installation missteps drive most pinched gaskets, and a few stand out from repeated jobs.
Uneven bolt tightening leads the pack. Tightening one side hard before the opposite side shifts the gasket and bunches it up. The standard cross-pattern method—alternating sides in gradual stages—prevents this, but tight schedules push crews to rush and skip steps.
Dry installation ranks right behind. Without lubrication the gasket drags against pipe ends and housing during closure. Friction builds, material twists, and pinching follows. Pre-lubricated EPDM gaskets cut this risk sharply; on larger sizes or colder days the difference becomes obvious.
Pipe end condition and alignment matter more than many realize. Ends need to stay square, free of burrs, and clean of dirt or grease. Even small debris prevents flat seating. In long chilled water runs or around equipment, slight misalignment stretches the gasket unevenly and pinches at high-stress areas.
Gasket placement errors compound problems. If the gasket sits off-center or twists on insertion, one lip folds under while the other over-compresses. Over-torquing makes it worse—pushing past recommended values crushes the material and sets permanent deformation.
Material choice plays a quieter role. EPDM suits chilled water well across a broad temperature range, but gaskets formulated for hotter service or different fluids lose low-temperature resilience and pinch more easily.
Chilled water systems add their own stresses. Pump vibration travels through the line, and thermal contraction tugs joints. A marginal pinch that survives initial fill often fails after repeated movement.
Spotting Pinched Gaskets Before They Become Problems
Early detection avoids major rework. Visual checks catch the clearest signs: gasket extrusion looks lopsided, with more bulging or folding on one side of the housing. The material appears flattened or creased in patches rather than evenly seated.
During pressure testing a gradual gauge drop signals a leak, frequently at the joint. Soapy water shows bubbles quickly. In running systems, damp insulation spots, exterior coupling corrosion, or ceiling stains below the run point to ongoing seepage.
Bolt torque checks provide another clue. Loose bolts after settling or values far outside specs indicate uneven compression. Leaks in chilled water sometimes wait until several thermal cycles pass, so dry or initial tests miss subtle cases.
Repair Sequence When Pinching Occurs
Address leaks traced to pinching without delay to limit damage.
Isolate the section and depressurize safely. Drain if required.
Loosen bolts evenly in cross pattern to prevent additional gasket damage during disassembly. Pull the coupling apart and examine the gasket—pinched areas show creases, tears, or set deformation. Replacement becomes necessary in nearly every case; reused gaskets rarely hold long-term.
Clean grooves, pipe ends, and housing interior completely. Remove old lubricant, debris, or gasket pieces. Confirm groove dimensions match specifications; out-of-spec grooves amplify sealing issues.
Fit a new EPDM gasket, pre-lubricated when possible. Position it centered between pipe ends with lips oriented correctly and no twists. Slide the housing over, aligning keys to grooves.
Start bolts by hand, then tighten in stages using cross pattern. Bring them up gradually to metal-to-metal contact on the pads. Stay within torque limits—values typically fall between 60 and 100 ft-lbs depending on size, but always cross-check the coupling specs.
Run a hydrostatic test at 1.5 times operating pressure or per applicable code. Hold duration and watch for drops. Tag the joint for follow-up inspection.
In live-system emergencies, external clamps offer temporary containment, but full disassembly and reassembly delivers the lasting fix.

Prevention: 10-Step Field Routine That Works
Consistent process eliminates the majority of pinching risks.
- Confirm pipe ends meet groove specs, deburred, and free of contaminants.
- Match gasket material and size to chilled water service—EPDM remains the go-to.
- Apply compatible lubricant generously if not pre-lubed; cover lips and pipe contact surfaces.
- Seat the gasket centered without distortion or twisting.
- Align pipes accurately; add temporary supports to hold position.
- Engage bolts by hand to avoid cross-threading.
- Tighten progressively in cross pattern: hand-tight, then incremental turns alternating sides.
- Reach metal-to-metal pad contact without overshooting torque.
- Verify even gasket seating visually—no irregular extrusion.
- Conduct immediate pressure test and re-check torque after settling period when possible.
Adhering to this sequence drops failure rates noticeably across chilled water projects.
Chilled Water-Specific Factors to Watch
Low temperatures in chilled water stiffen EPDM, so lubrication and alignment demand extra attention. Pump and chiller vibration transmits to joints; placing flexible couplings at key locations absorbs motion and eases gasket stress.
Insulation hides leaks—condensate masks small weeping—so plan access or use breathable wraps near joints during startup. Thermal contraction shortens lines slightly; adequate supports and expansion provisions prevent added pull that aggravates pinching.
Long commercial runs benefit from strategic expansion joints using grooved components to manage movement while preserving seal integrity.
Acerca de Hebei Jianzhi Foundry Group Co., Ltd.
Hebei Jianzhi Fundición Grupo Co., Ltd. began operations in 1982 and has grown into a significant producer of grooved pipe fittings under the Jianzhi brand. Facilities span Hebei Province and Inner Mongolia, covering large production areas with substantial assets and a workforce that includes a strong technical group. The lineup centers on ductile iron grooved couplings, mechanical tees, crosses, flanges, and related connect fittings manufactured to international standards.
The company maintains ISO 9001 quality and ISO 14001 environmental certifications, contributes to national and industry standard development—including key roles in several GB standards—and holds over 200 patents as a recognized high-tech enterprise. Products reach distributors in more than 100 countries, reflecting consistent focus on casting precision, groove accuracy, and dependable performance in applications such as chilled water piping.
Conclusión
Pinching in grooved fitting gaskets disrupts chilled water systems more than it should. Identifying causes—primarily uneven tightening, inadequate lubrication, and alignment errors—combined with disciplined assembly practices yields reliable joints from the outset. Structured prevention steps and awareness of chilled water conditions reduce rework and downtime. Components built to tight tolerances further support long-term joint stability under pressure and temperature shifts.
Preguntas frecuentes
Why does a grooved coupling leak right after installation in chilled water lines?
Immediate leaks typically result from gasket pinching due to uneven bolt tightening or insufficient lubrication. The gasket compresses irregularly, allowing water paths during fill or pressure testing.
How can I tell if the gasket is pinched in a grooved fitting?
Uneven extrusion around the housing—one side bulging or folding more—serves as the primary visual indicator. Pressure drops, bubbles from soapy water, or visible seepage at the joint confirm pinching.
Can a pinched gasket in chilled water grooved joints be reused?
Replacement is required. Pinching causes permanent deformation that prevents reliable resealing, especially after thermal cycles in chilled water service.
What torque is needed for grooved coupling bolts in HVAC chilled water systems?
Torque depends on size but targets metal-to-metal pad contact without exceeding manufacturer limits—commonly 60–100 ft-lbs for mid-range sizes. Cross-pattern tightening remains essential.
How do I prevent gasket pinching when installing grooved fittings for chilled water pipes?
Lubricate the gasket thoroughly, center it accurately, align pipes precisely, and tighten bolts evenly in stages to proper contact. Pre-lubricated EPDM gaskets and a consistent 10-step process minimize friction and misalignment risks.